Day 1 - Preparing the Dough
Ingredients for the dough : eggs, white sugar, flour, baking powder, vanilla extract/essence, unsalted butter and salt.
1 : Cream Butter and White Sugar together
2. Add the eggs and vanilla extract/essence ( I know not so appetizing ) But I assure you it does taste really good after it is done.
3. Add the flour, salt and baking powder ( mix until combine)
4. Separate the dough and put them in cling wrap and leave it in the fridge overnight.
Day 2 - Rolling, Cutting and Baking
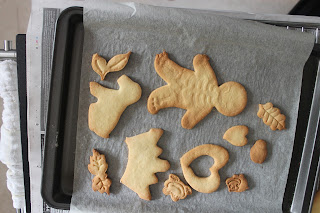
Most of the cookies cutters we used.
Halloween Cookies
Sandwich Cookies
Messy Table
The fillings for my sandwich cookies : Nutella and Peanut Butter & Jelly. I actually wanted to use pre-made cream cheese frosting. But it tastes terrible thus I only filled one cookie.
Day 3 - Decorating
Before I show you the pictures of my decorated cookies. I will first tell you the recipe that we used for the royal icing. Click the link -> Wilton Royal Icing
The fondant decorating table (above) Royal Icing decorating table (below) Messy right?
All the cookies that were decorated on day 3 and there is still more cookies to be decorated. (pictures below)
Day 4 - Decorating (continued)
These cookies are then brushed with luster dust.
This is to give this snowflake some dimension. see how the pattern pop up more with the painted luster dust as compared to the original (above)
Process of painting on the luster dust. (add a few drops of lemon extract and a small scoop of luster dust and you will get a paint like mixture) use a clean/new fine brush to paint.
Decorated cookies for the day. Finally its the last batch. (pictures below)
Day 5 - Packaging
It finally comes to the packaging of the cookies. They are individually wrapped in zip lock bags. and then wrapped with a silver ribbon.
Finished Product (A total of 61 individual bags)
Hope you Guys Enjoyed the pictures =)
These was sure a tiring job. but I loved every minute of it.


No comments:
Post a Comment