Friday, 29 June 2012

China Glaze Magnetix II Collection Swatches

Hie all, I got more swatches for you guys from the china glaze magnetix II collection. Since i couldn't help myself, I have gotten 3 more colours. POSITIVELY IN LOVE, CON-FUSED? and SPARKS WILL FLY.  oh and mum had gotten 2 OPI glitter shades. TAKE THE STAGE and PROS & BRONZE. So I decided to swatch those too. here are the pictures, do enjoy. 
 5 new polishes. =)
orange glitter shades up close.
Full swatched nail wheel.
closer view for the orange glitter shades. personally, considering I am not that fond of orange shades, i prefer the lighter orange shade as it can be layered over other polishes. 
I swatched the green magnetix polish (Con-fused?) while using both the first collection magnet as well as the second collection magnet. And comparing the other 2 magnetix polishes i gotten, the green one gave the best results. Ps : since china glaze magnets are not as strong as the other brand magnets. it is crucial to hold the magnet over your nail or fake nail a lot longer to let the polish design to dry and set so it doesn't run.
 The blue magnetix polish (Sparks will Fly) again while using both magnets. this one gave the second best results. though the star shaped design run out of shape before it dried. I guess it takes practice to make it perfect.
Lastly, the magenta magnetix polish (Positively in love). it shows results but it is the worst out of the 3 polishes. a lot design did not stay in shape. for example is the star and the checked design. I guess i did not allow the polish to dry first before putting the top coat. Anyway, since there isn't any swatches for the II collection for the magnetix polishes from china glaze, I hope these pictures would help you decide whether you want to purchase this collection. but personally, I like all the colours in this collection. 

Thursday, 28 June 2012

Girlfriends's manicure.

Hey all, so today my friend came over to play =).. so i decided to do her nails...using glitter gal duo chrome *hell-bent blue* with a acrylic ribbon drawn on any one of your fingers. She decided it to be on the middle finger and i call it the ribbon manicure hope u guys like it =). Do comment  =)


Wednesday, 27 June 2012

New Polishes and swatches =)

Hey guys,  so my posts would be a little slow now since i start school this week. But the polishes that I bought a few days ago have finally arrived so I did some swatches. so enjoy =)
I bought 3 Glitter Gal duo chrome colours, nail polishes that have two colour shades. =) From the left : Contorted Mauve, Twisted Jealousy and Hell-Bent Blue.
From the left : Purplish gray nail polish, Greenish chocolate nail polish and lastly, Bluish purple nail polish. The second colour can be seen from the edge of the bottle.
 Swatches from the Glitter Gal colours, as you can see the two shades of colour. =)
 I also bought 2 of the China Glaze magnetix II Collection. Gold Fusion (A gold metallic colour) and Bond-Tastic (Copper metallic colour). Above picture shows the old design magnet as well as the new magnetix II collection magnet with three new designs (circle, grid and vertical lines).
 Gold Fusion while using the new magnet.. the designs can't really be seen =0. Guess I haven't mastered the art of using the magnets or its just the shade.  I guess I would never know. =)
Bond-Tastic while using the new magnet.
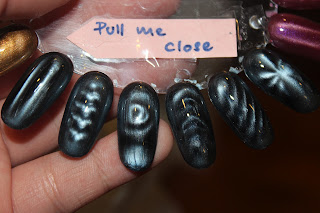
 More Swatches of the new magnet as well as the old one.  These one using China Glaze - Pull Me Close. A Bluish gray colour. 
 These one I am using Led Magnetic Polish, A violet and pink mix colour.
 Using Led Magnetic Polish, Red and Green.
 My Display Wheel.

These picture is to show the OPI Spiderman collection shatter as well as their Greenish and Gold duo chrome. =) 

Sunday, 24 June 2012

hey guys, have been busy these couple of days, with school starting, there is alot preparations to be done. Anyway, here is a few pictures on baking and nail art =) so hope u guys enjoy.
 our homemade caesar salad for lunch on 22 of June. tasted awesome. Found the recipe in a magazine called delicious. 
 Orange Cake in the oven. =) 
 Smelled and tasted delicious but mum commented that it was too dry. I guess Americans secrete more saliva so it is okay for them. As the recipe came from an american website. =) Asians don't secrete that much saliva =0 but I think it was okay even though i am asian =0 Ps: not saying bad or anything 
 The making of our cake pops. Cutting the already cooled whole cake into crumples. 
 Add a bit of cream cheese frosting and mix it all up till it becomes like a dough.
 Measure 30g of the cake dough and roll it up into a ball. just as it is shown in the photo above. Then put it in the freezer for awhile.
I missed taking a photo of the step before this but it just melting some candy melts in a double boiler or microwave. Deep some of the candy melt using the lollipop stick and stick it into the cake pops and then put it back in the freezer or fridge so that the sticks are firm and won't fall out of the cake pops. As shown above.
After the lollipop sticks are firm. take it out and deep the cake pop in the candy melts. and decorate it how ever you like. And then stick it on a block of styrofoam or candy pop stand or like me put it in the cup to dry.
 Once it has harden. you are done. =) one final note... the cake pops were really really sweet so if you are the kind of person who doesn't like sweet things i suggest you not to make it. or you could make the cake without sugar to counter the sweetness of the candy melts =). 


 giving to people just wrap it up in cute foil or lollipop wrappers  =)

 here is my new manicure because my previous one had came off =)  According to the website, it said this is the fish tail manicure. 
and some other designs i did.  

Tuesday, 19 June 2012

Hie guys, so i finally painted my nails after leaving it to breath for 2 weeks and i tired a design from this website. its called a tap manicure <-- click the link to see the tutorial.. here is the picture below 
I used opi -> black onyx and opi ds series -> DS Fantasy 

Alrite, now for the fun part... pictures from my baking with my lonely self today =) hope u guys enjoy.. i used betty crocker pre-made batter today.
first up is betty crocker 's sugar cookies.. i used all the small cookies cutters today. As I could make more but don't you think they look adorable =)


After it has done its time in the oven. And as you can see from right to left, how the cookies from being out of shape to it retaining its shape. 
see the differences from both pictures. top and bottom.

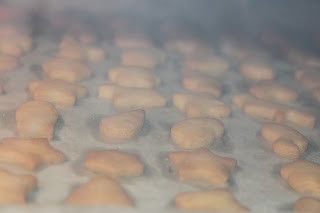
Second or was it third batch of cookies in the oven.


Finished all the sugar cookie batter.

 Secondly, with have betty crocker's wholemeal chocolate chip cookies.
 on to the cookie tray.
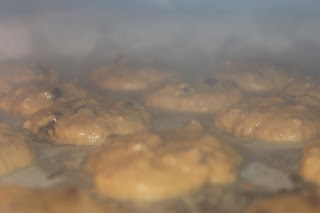
 Cooking in the oven.

 see how it spreads from a teaspoon drop of cookie batter, you get these huge cookie.


When baking is done, remember to clean the area as well as put your cookies into an air tide container... Red container, my mum got for me to put my cookies.